Introduction
This article will guide you through the process of configuring FortiGate to send notification emails based on network events, helping you stay informed and maintain the security of your network.
Benefits of Automated Email Notifications
Automated email notifications provide several key benefits to network administrators:
- Proactive Monitoring: Receive instant alerts on critical events such as security breaches, device status changes, or policy violations.
- Rapid Response: Quickly address issues by being notified in real-time, minimizing downtime and potential security threats.
- Efficiency: Reduce manual monitoring efforts by automating the notification process, freeing up IT resources for other tasks.
- Customization: Tailor notifications to specific events and conditions relevant to your network environment.
Configuring FortiGate to Send Notification Emails
To configure FortiGate to send notification emails on specific events, follow these steps:
Step 1: Configure Email Settings
- Access the FortiGate Web Interface:
- Log in to your FortiGate device’s web interface using administrator credentials.
- Navigate to Email Settings:
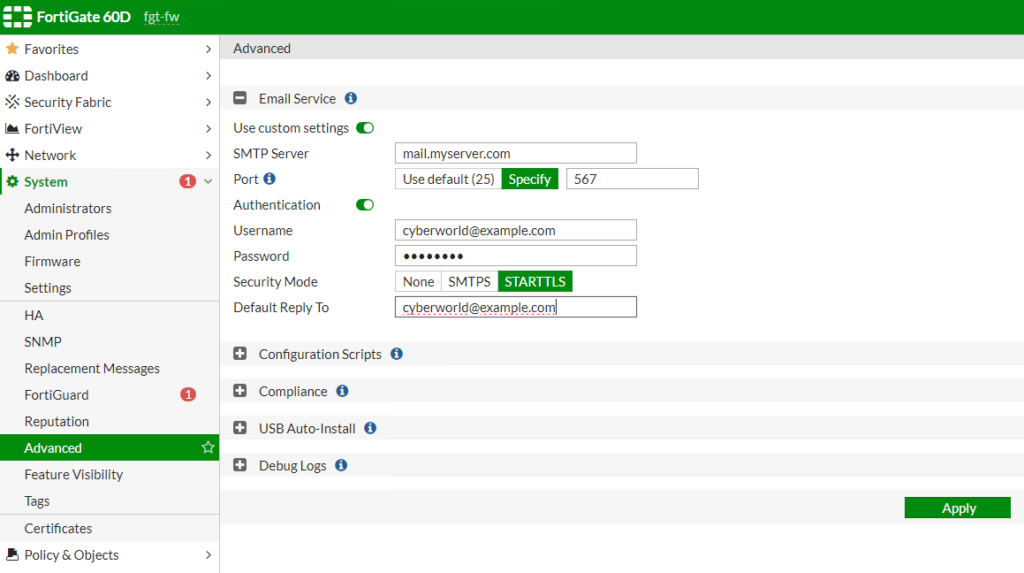
- Go to System > Advanced > Email Service.
- Set Up SMTP Server:
- Enter the details of your SMTP server, including server address, port, and authentication information (username and password).
- Specify Sender Email:
- Enter the email address that will appear as the sender of the notification emails.
Step 2: Create an Automation Stitch
FortiGate uses automation stitches to define a set of conditions and actions for automated tasks.
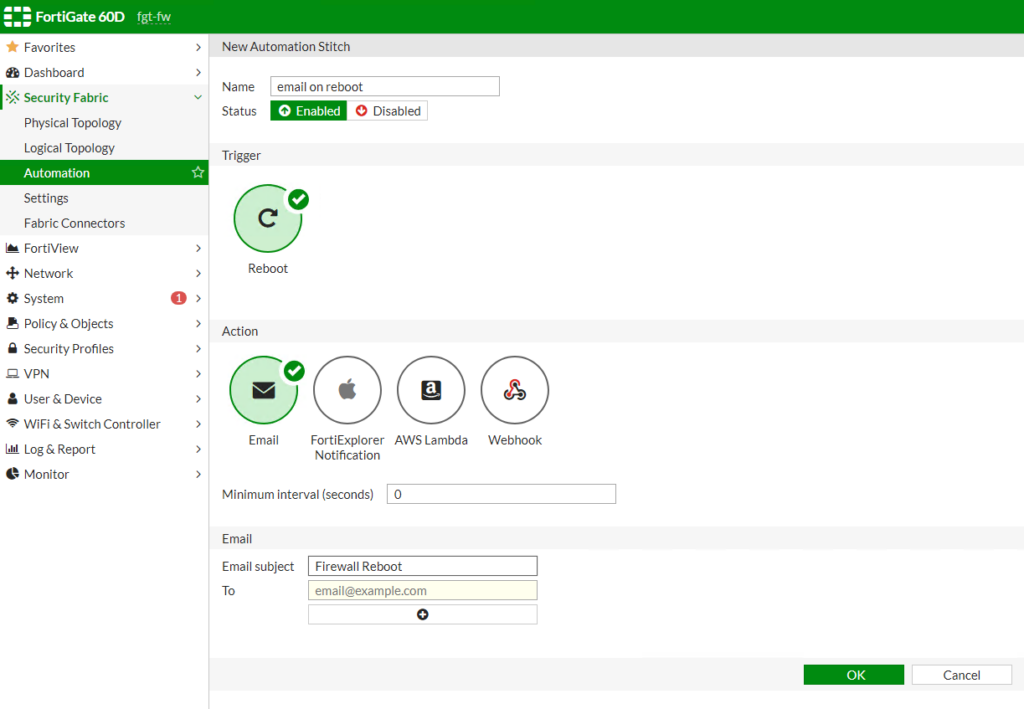
- Go to Automation: Navigate to Security Fabric > Automation > Create New.
- Name Your Automation Stitch: Provide a descriptive name for the automation stitch.
- Define Trigger Conditions: Select the event or events that will trigger the email notification. For example, you can choose triggers like system log events, security alerts, or traffic anomalies.
- Configure Action: Set the action to send an email notification. Specify the recipient email addresses that should receive the notification.
- Customize the Message: Optionally, customize the subject and body of the email message to include relevant details about the event.
- Save and Activate: Save the automation stitch and ensure it is activated to start monitoring for the specified events.
